Home » Small Game Cooking » Woodcock, Porcini, and Parmigiano Ravioli
Woodcock, Porcini, and Parmigiano Ravioli

Rossano Russo is a Canadian Italian from Ontario Canada. He…
Handmade ravioli may be the ultimate comfort food, especially when filled with braised woodcock meat
During my childhood, ravioli was always a special treat, made and enjoyed on special occasions. The dish took time and effort to prepare, but it was always worth it. My late mother’s ravioli was a perpetual hit; she was well known for them. I took inspiration from her when I developed my woodcock ravioli recipe.
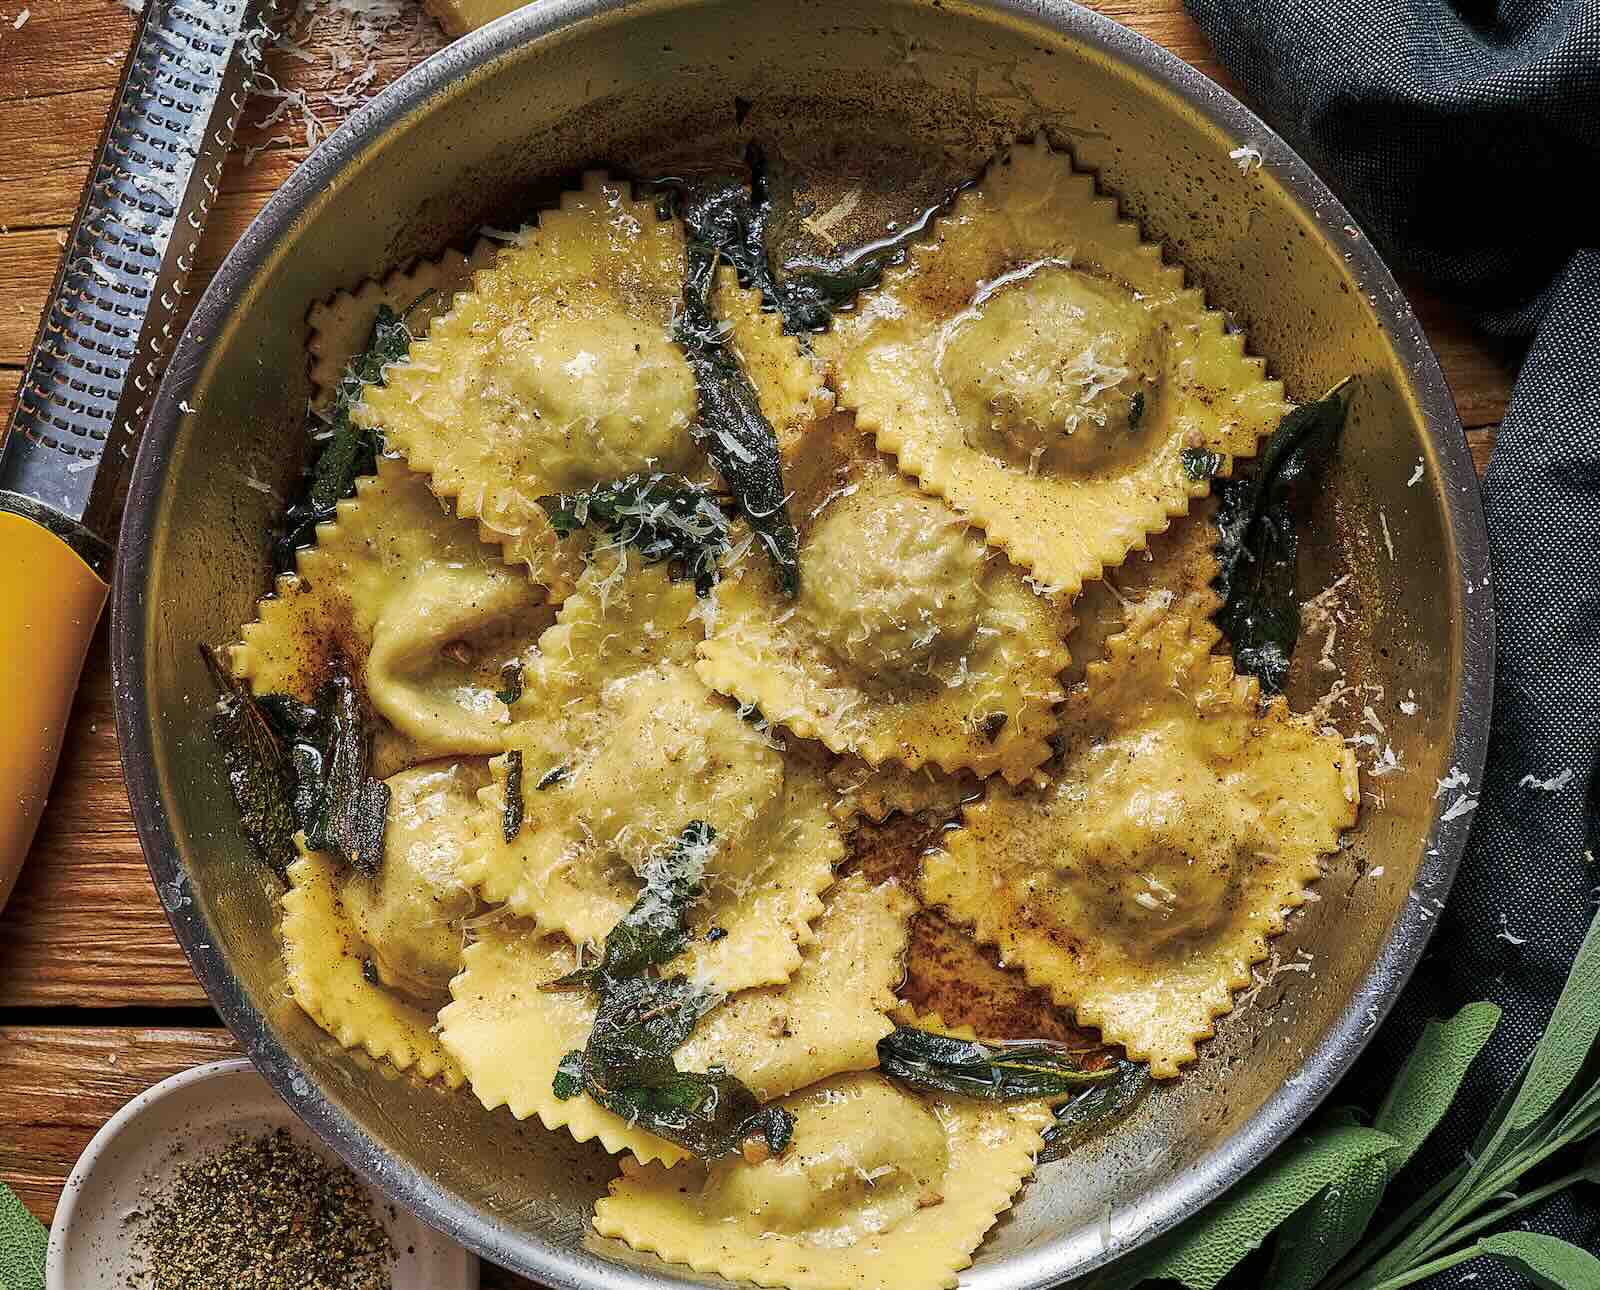
This dish combines the rich, gamey flavor of woodcock with earthy porcini mushrooms, the nutty sharpness of Parmigiano-Reggiano, and tender homemade pasta. I start by braising whole woodcock in white wine and sofrito until the meat pulls off the bone. The tender meat becomes the base for this unique dish. Once pulled and minced, the woodcock is mixed with the porcini mushrooms and grated cheese, wrapped in pasta, and served with a sage and browned butter sauce. Honestly, this dish elevates the woodcock in a way that even surprised me!
If you couldn’t tell, creating this dish takes time. You can braise the woodcock a day in advance, if you’d like, and then make the pasta dough the following day. Assembling the ravioli can be a fun family affair or a way to spend quality time with your partner.
Editor’s note: This recipe originally appeared in the Winter 2024 issue of our print magazine

Woodcock, Porcini, and Parmigiano Ravioli
Equipment
- Pasta maker
- Ravioli mold optional
Ingredients
Braised Woodcock
- 4 woodcock skin on
- 1 small onion finely chopped
- 2 small carrots finely chopped
- 3 stalks celery finely chopped
- Salt
- 2 bay leaves
- 2 sprigs fresh rosemary
- 4 tbsp olive oil
- 1 cup dry white wine
- 1 tbsp tomato paste
Filling
- Braised woodcock meat (from above), finely minced
- ½ cup dried porcini mushrooms
- ½ cup grated Parmesan-Reggiano
- 1 clove garlic minced
- 2 tbsp olive oil
- Salt and pepper to taste
Sauce
- 6 tbsp unsalted butter
- 1 handful fresh sage leaves
- Pepper to taste
- Grated Parmesan-Reggiano for garnish
Instructions
Braised Woodcock
- Warm 4 tablespoons of olive oil in a Dutch oven over medium-high heat.
- Pat the woodcock dry, season with salt, and place in the hot oil, browning on all sides. Once browned, remove the woodcock from the Dutch oven and set aside.
- Over medium-low heat, when the oil is shimmering, cook the vegetables gently for at least 5 minutes or up to 20–25 minutes, depending on your preference. Sauté until the onion is translucent and the vegetables are soft, avoiding frying or burning them.
- Add the browned woodcock back to the Dutch oven along with any accumulated juices, 2 sprigs of fresh rosemary, and 2 bay leaves.
- In a cup, mix ½ cup of white wine with 1 tablespoon of tomato paste and whisk. Pour this mixture into the Dutch oven, then add the remaining ½ cup of wine, or enough white wine to cover the woodcock halfway.
- Turn up the heat to bring to a boil, then reduce to a simmer. Cover and braise for about 1½ hours, or until the woodcock is tender.
- Once tender, allow the meat to cool, then tear it off the bone and finely mince it. Use the whole bird, including the legs, as there is fat there that adds flavor. At this point, you can refrigerate the meat and make the ravioli the next day if you wish.
Woodcock Ravioli
- In a pan, heat 2 tablespoons of olive oil over medium heat. Add the minced garlic and sauté until fragrant.
- Add the rehydrated porcini mushrooms to the pan, cooking them until they’re tender and any liquid has evaporated. Once cooled, chop them finely.
- Combine the minced woodcock meat, finely chopped mushrooms, and grated Parmigiano-Reggiano in a bowl. Mix well, then set the bowl in the fridge.
- On a clean work surface, mound the flour and create a well in the center. Crack the eggs into the well. Add a pinch of salt and olive oil to the eggs. Using a fork, gently beat the eggs, gradually incorporating the surrounding flour. Continue mixing until a sticky dough begins to form.
- Once the dough starts coming together, use your hands to knead it. Knead for about 8–10 minutes, or until the dough is smooth and elastic. If the dough is too sticky, sprinkle it with a bit more flour as you knead. If it’s a little dry, wet your hands with some water and continue kneading until smooth.
- Shape the dough into a ball and wrap it tightly in plastic wrap. Let it rest at room temperature for at least 30 minutes; this allows the gluten to relax, making the dough easier to roll out.
- After resting, divide the dough into four even portions. Using a KitchenAid pasta attachment, pass each portion through the machine, starting on setting 1 and gradually working up to setting 5. Each portion should roll out into sheets approximately 2 feet long and 10 inches wide.
- Lay the sheets onto a lightly floured tablecloth to prevent sticking. Lightly flour the sheets of pasta dough as well.
- Lay out a sheet of pasta and place small mounds of filling (about 1 teaspoon each) evenly spaced along the sheet.
- Lightly brush around the filling with water or egg wash to help seal the ravioli.
- Carefully place another sheet of pasta over the filling, pressing around each mound to seal and remove any air pockets.
- Cut the ravioli using a pasta cutter or knife, ensuring each piece is well sealed.
- Repeat with the remaining dough and filling.
- Bring a large pot of salted water to a boil. Add the ravioli and cook for 2–3 minutes, or until they float to the surface.
- Meanwhile, in a large skillet, melt the butter over medium heat. Add the sage leaves and cook until the butter is golden brown and the sage is crispy.
- Drain the cooked ravioli and add them to the skillet with the sage butter. Toss gently to coat.
- Serve the ravioli hot, garnished with additional grated Parmigiano-Reggiano and a sprinkle of black pepper. Enjoy!
Nutrition
Rossano Russo is a Canadian Italian from Ontario Canada. He is an electrician by trade with a passion for photography, hunting, and cooking. Follow him on Instagram @rossanorusso.


