

Hand-Carving Turkey Pot Call Strikers
Best practices and techniques for creating unique, handmade turkey strikers at home, from wood selection to tool usage.
Some say the sweetest springtime sounds come from wild turkeys. As many turkey hunters have experienced, real turkeys aren’t always the ones producing that cacophony of yelps. Oftentimes, on crowded small parcels of land, one may be seduced by the sounds emanating from what turns out to be a hungry hunter, not a hen on the prowl. Hunters using turkey calls have tricked birds and humans alike for years.
Listen to more articles on Apple | Google | Spotify | Audible
For nothing more than a little scavenged wood and your time, you can maximize the effectiveness of your expensive pot call with something meaningful and customizable. Even better, handmade turkey strikers make for wonderful ways to immortalize memories. A striker made from Grandpa’s apple tree or the lightning-struck oak you leaned against to harvest your first bird are two lovely ways to preserve cherished moments. Creating strikers or pegs from sentimental, non-wood materials is a great way to remember those special occasions, too. Hand-carved strikers also make for thoughtful gifts for any turkey hunter; handmade beats mass-produced any day of the week.

The First Turkey Striker
The first patent for a turkey striker came along in July 1912. A doctor named Wade H. Saunders created the first peg/striker and slate call. He named it a Simplex Turkey Call. It featured a simple piece of slate paired with a “tone tube with a vibrating needle,” and was sold for $14 per dozen.
Just like Mr. Saunders realized over 100 years ago, no two strikers sound the same. This is why your significant other shouldn’t get upset with you for littering wood chips and shavings all over the living room floor—you never know which striker is going to seal the deal with that elusive tom.
Choosing Turkey Striker Wood Type, Size, Quality, And Tip
There are thousands of types of trees and, consequently, types of wood that could be used to create a turkey striker. Traditionally, better sounds are made from denser wood, but almost any type will produce sounds that resemble a turkey. I prefer to use a smaller tree limb or medium-sized sapling as opposed to a large tree trunk. The larger it is, the more material you’ll need to remove and the more work it will be. I look for a piece that’s about two to three inches in diameter and as straight as possible.
You can also work with either wet or dry wood. The wetter the wood, the easier it is to carve. Just remember that If you are carving wet wood, you’ll likely need to wait a few weeks or a month for it to cure and dry out before it’s ready to use in the field. Wet or dry, the key is selecting a piece of wood that’s straight and free from cracks, which impact the sound quality. You want a striker that’s solid, strong, and free from any weak points.
The striker’s handle should be long enough to create the proper resonance and vibration, but not too long that it’s unwieldy or unable to fit in your turkey vest. You don’t need to reinvent the wheel. Use a striker that you know works well as a guide for length and girth. I’ve also made a handful of mini strikers that work well, too.
When selecting a tip, you can choose between flared, flat, or curved. Some more experienced callers believe flat or curved tips produce better results when matched with specific pot call surfaces, but you’ll have to experiment to determine that for yourself. Any of them will produce great turkey sounds; it just may take a bit of fine-tuning.
The striker, in its entirety, can be made from a single piece of wood. However, you can also make the handle and the tip out of two different materials. If you’re feeling creative, you can use different pieces for the shaft and the tip. If you’re creating a two-piece striker, you can whittle the shaft and tip to your desired diameter and top it with either a handmade or carved handle. You can even use something old-school for the handle, like a corn cob.
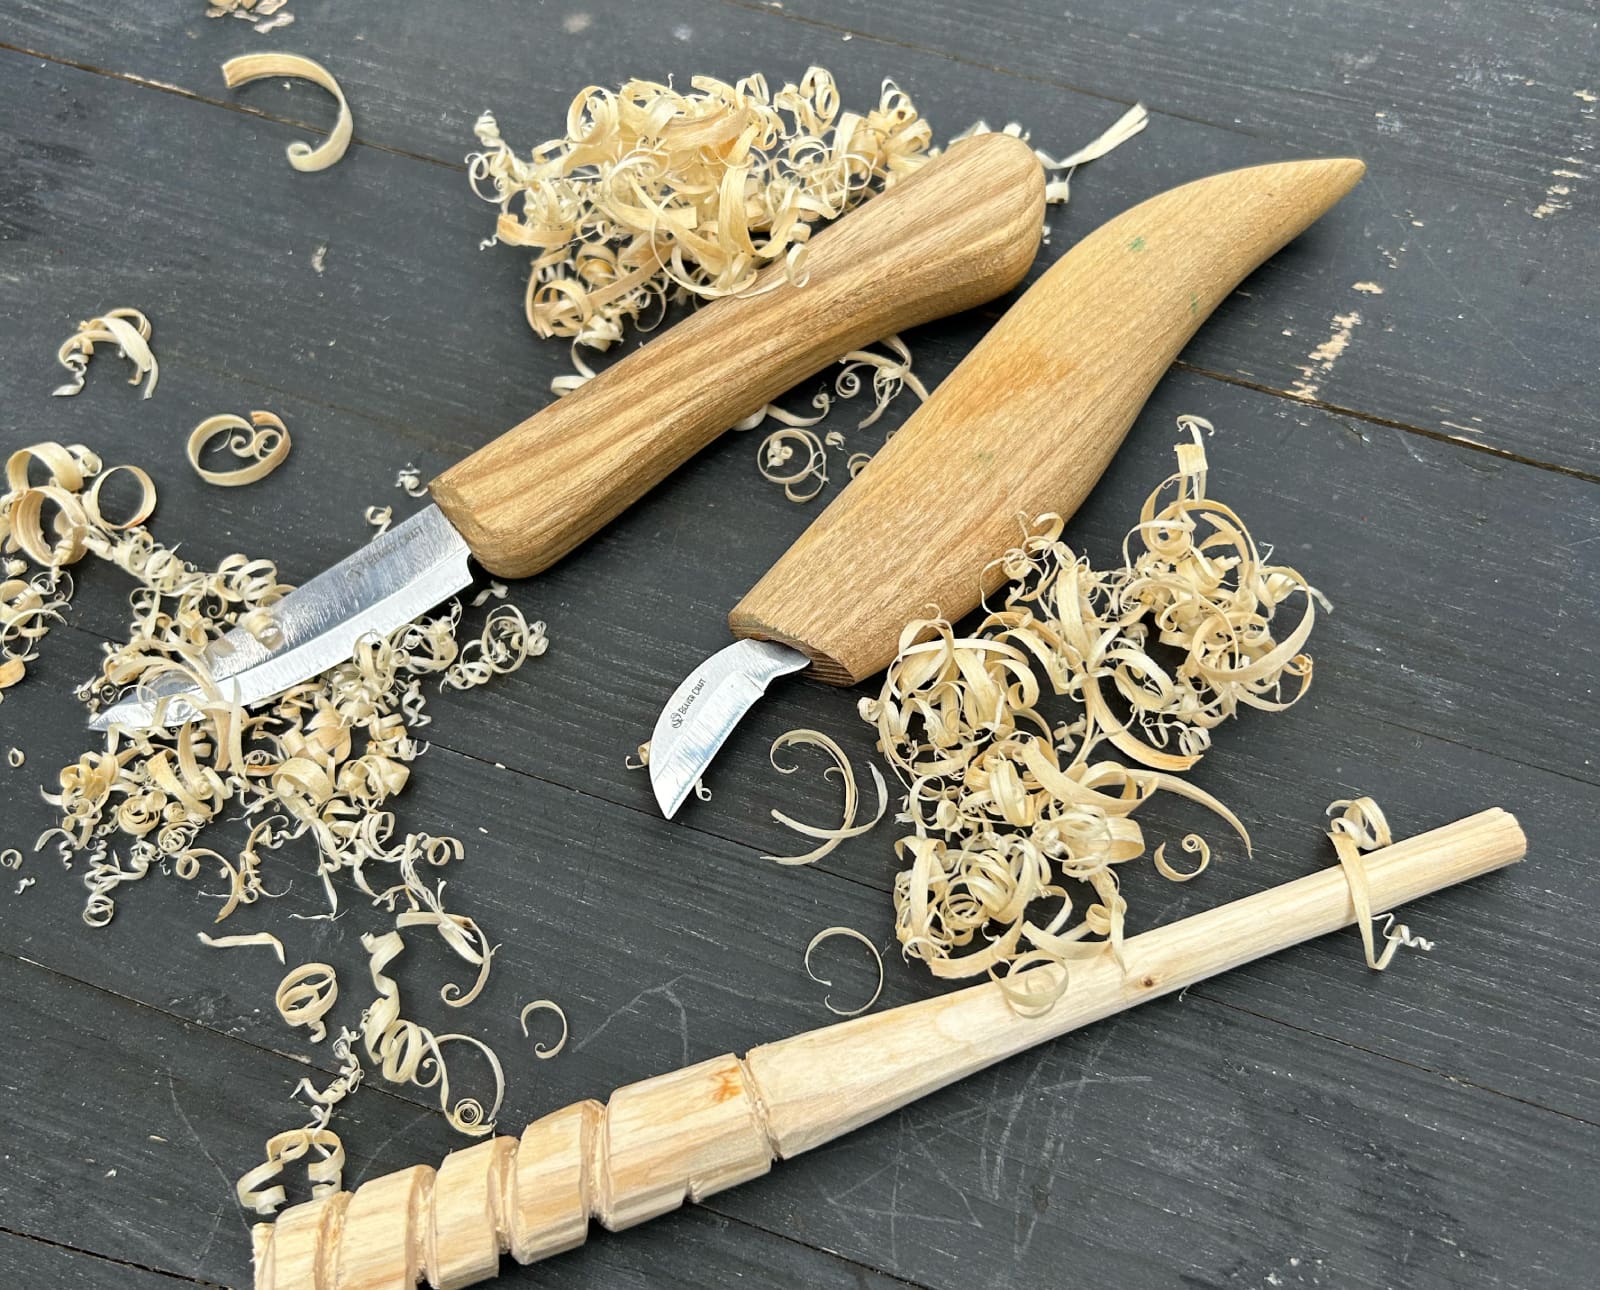
Building A Hand-Carved Turkey Striker
Fortunately, carving turkey strikers isn’t rocket science. You’ve likely whittled pieces of wood since you were a kid, and this won’t be any different. The striker is inside that log or branch, you just need to bring it to fruition.
The Handle
Start with your piece of wood and remove pieces one by one until you reach your desired look, shape, and sound. Use a hatchet or axe to remove large pieces rather than your knife. After that, use your whittling tools to trim the wood into a cylindrical shape with your hands acting as a lathe. Don’t want to carve a perfectly cylindrical striker? Don’t! You can make your striker in whatever shape you’d like, as long as you’re happy with the sound.
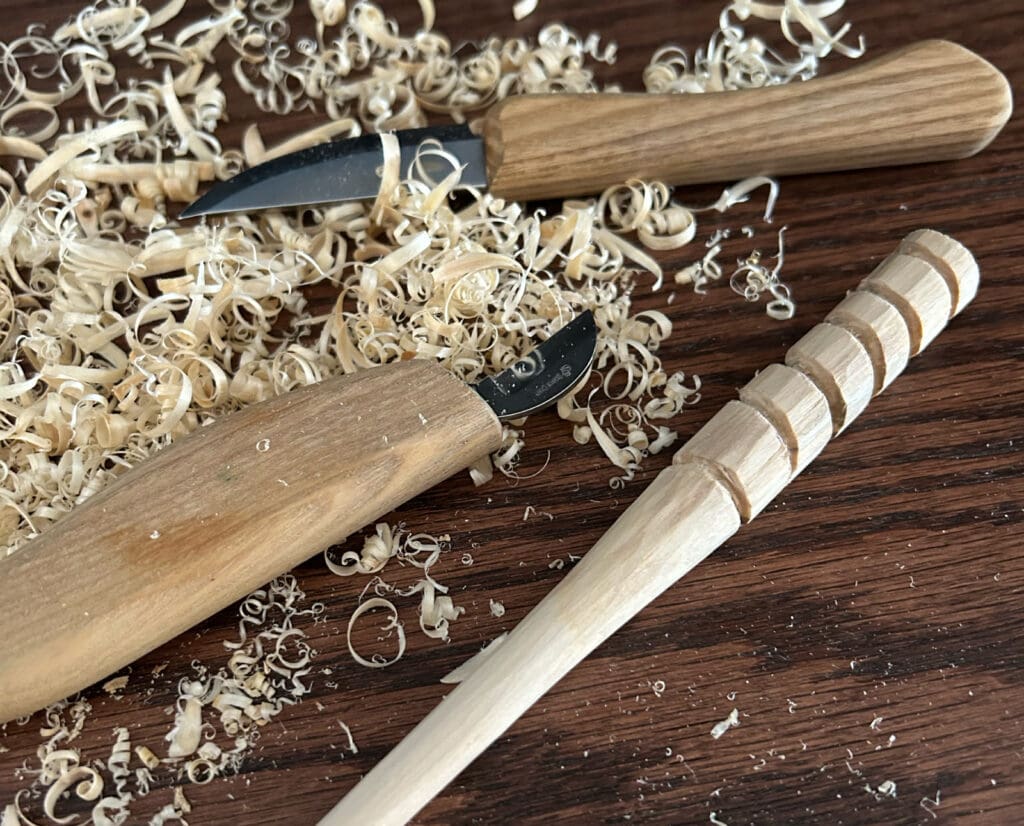
Personally, I like to move in a clockwise fashion, rotating the wood in my hand while maintaining the same angle on my blade to make sure I don’t remove too much wood. I trim each edge as I go until I’ve reached my desired diameter for the handle. Remember, it’s much harder to go back and reduce the size once intricate details have been added, like lines or helices.
Eventually, you’ll have a cylindrical shape that fits comfortably in your hand. Then, use a pen or Sharpie to mark your details, such as a helix, lines, or contours. I also like to make marks to indicate the beginning of tapered spots or changes in diameter. This helps keep my lines neat and details organized, and all the pen marks get carved or sanded away.
From there, you’ll select the carving knife that best suits your design needs. If you’re working with a helix or corkscrew for your handle, I prefer to use a chipping knife, which gives me added control and allows me to make deep, precise cuts to remove unwanted material. If you’ve decided to use a corncob for the handle or another material you don’t want to carve, then you can skip this step and focus on the shaft and tip.
The Tip
Regarding tip design, there are three common options: curved, straight, and flared. The flared shape provides more surface area and is typically easier for novices to use. The rounded tip is more popular and is found in many commercially built strikers. The straight tip is the least common option. I recommend experimenting as you go until you end up with your ideal sound and pitch.
If you’re not sure, start with a flared tip and see how it sounds. You can always remove material to make either a curved or flat end if you don’t like what you hear. For the lower portion of the striker or the shaft, including the tip, I use my usual whittling or carving knife to remove material until I have a tip and body of the striker that sounds good to me, testing it as I go.
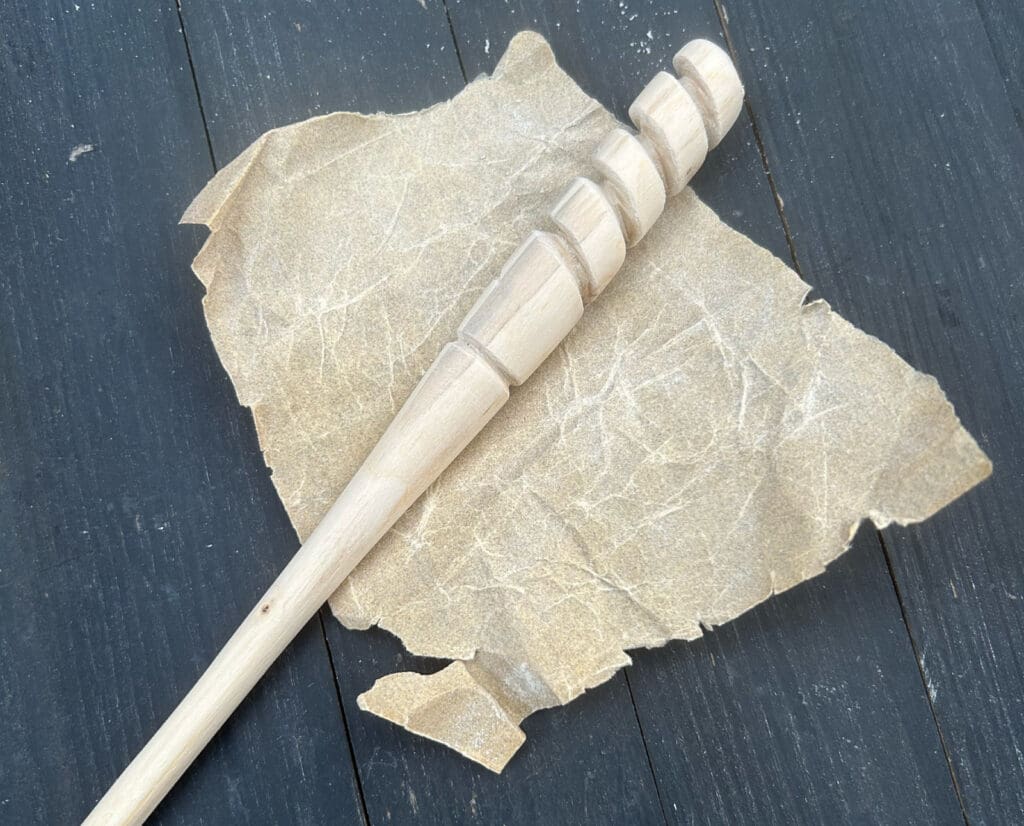
Finishing Your Turkey Striker
Once you have carved your details to the depth and degree you envisioned, it’s time to begin the finishing process. Start with heavier grit sandpaper and go over the entirety of the striker. If you’ve added a helical design, roll up a small piece of sandpaper and use the edge to get inside the tight recesses. When you’re done, move to a lighter grit sandpaper to smooth and finish the surface.
Sanding is a great way to remove small amounts of material to fine-tune the sound and look of your striker. Avoid sanding the tip of your striker as much as possible; you don’t want it baby-bottom smooth. Sound is made via friction, and for that to happen, you need a bit of roughness.
More than anything, the material, as well as the thickness of the shaft, dictates the quality and pitch of the sound produced. Too low? That means your striker may be too thick. Too high? You may have removed too much material. If you think you’ve gone too far, try adjusting the tip’s size or shape to see if that improves or changes the sound. With that in mind, it’s always better to air on the thicker side. You can’t add material if it gets too thin.
Depending on your wood choice, you may be left with a gleaming piece of light-colored wood that will undoubtedly stick out like a sore thumb as it twitches from side to side as you use your pot call. To combat this, I stain the entire striker a dull brown hue using a traditional walnut stain. In a pinch, I’ve also used boiled-down coffee. Let the stain dry completely.
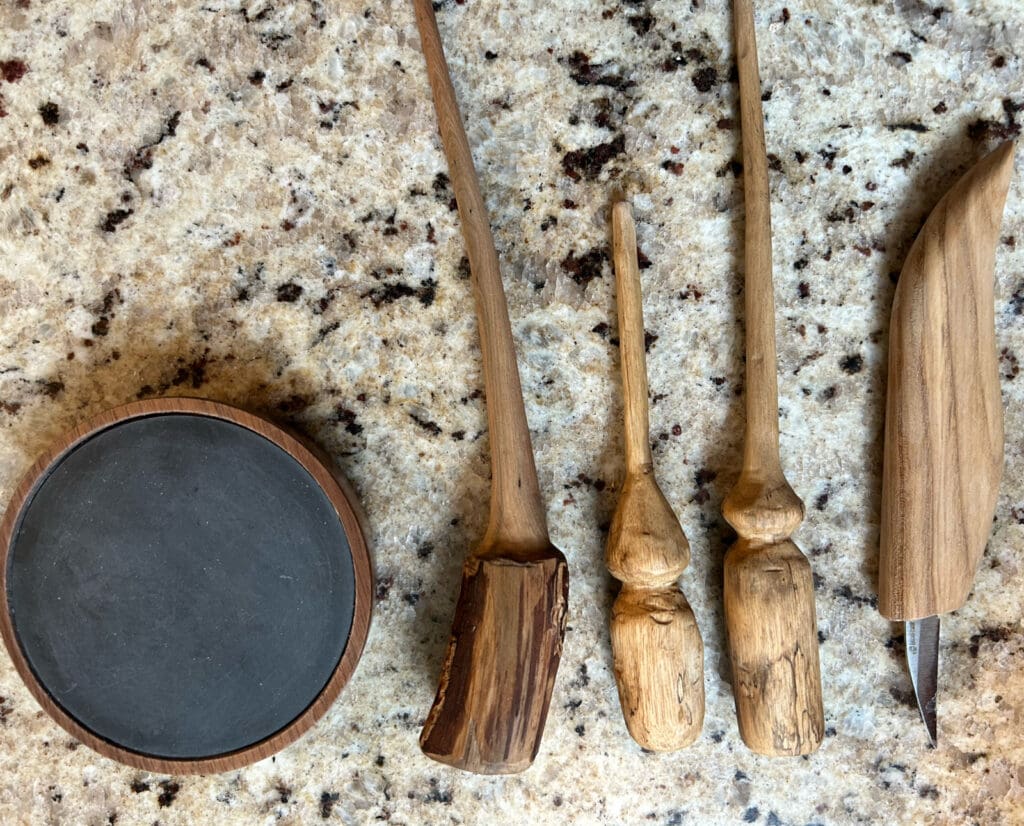
You can stop there and have a perfectly good striker, but you can add a little longevity to your striker by protecting it with beeswax or acrylic spray. Use a Q-tip to get into any intricate carvings. I like to tape off the tip during the waxing process because, if the tip gets contaminated, it will render your striker much less effective or even useless. If you do accidentally get some on the tip, use heavy grit sandpaper to remove the lubricated wood. When done, use a piece of cloth or paper towel to remove any excess wax, then let it dry.
A pot call paired with homemade strikers is just one of the ways you can replicate hen calls. Creating your own strikers to accentuate your pot calls is a great way to ensure you have multiple auditory offerings, with each striker creating its own unique sound. Nothing beats calling in a big tom using your own skills and abilities, but what makes that moment even sweeter is when it’s done using tools you’ve made yourself.