12 Things to Add to Your Canine First Aid Kit
These household items are important additions to your dog first aid kit to improve your emergency medical care in the field
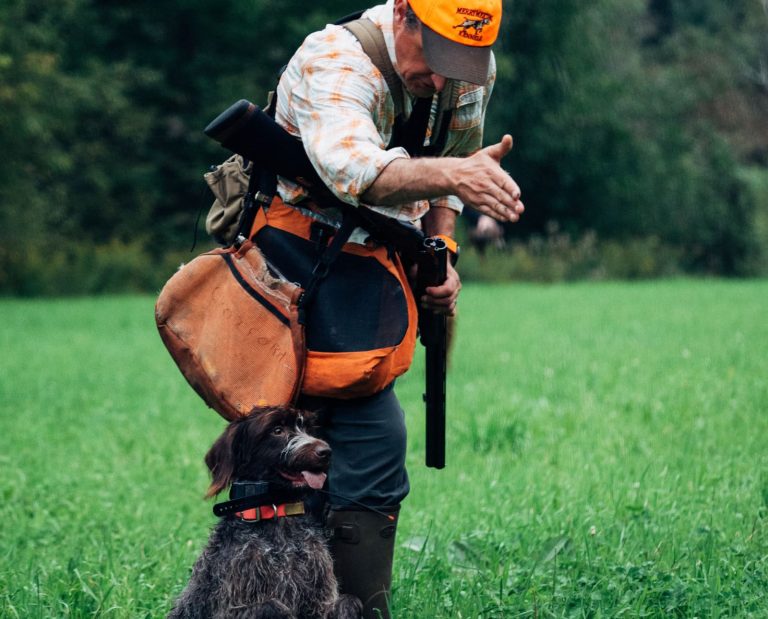
One of the most important roles we take on as gun dog owners is that of field veterinarian. Sooner or later, your dog will get hurt and rely on you to stabilize them long enough to reach the vet clinic, which could be hours away. Ready-made canine first aid kits have come a long way in recent years. They are a great foundation for your own personal kit, but since they are a one-size-fits-all product, they will need to be customized to your personal needs and experience level. Here are 12 items that I added to my out-of-the-box kit and a brief description of how they elevated my simple canine first aid kit into canine first aid gear.
Items to supplement a standard first aid kit
T-Shirt
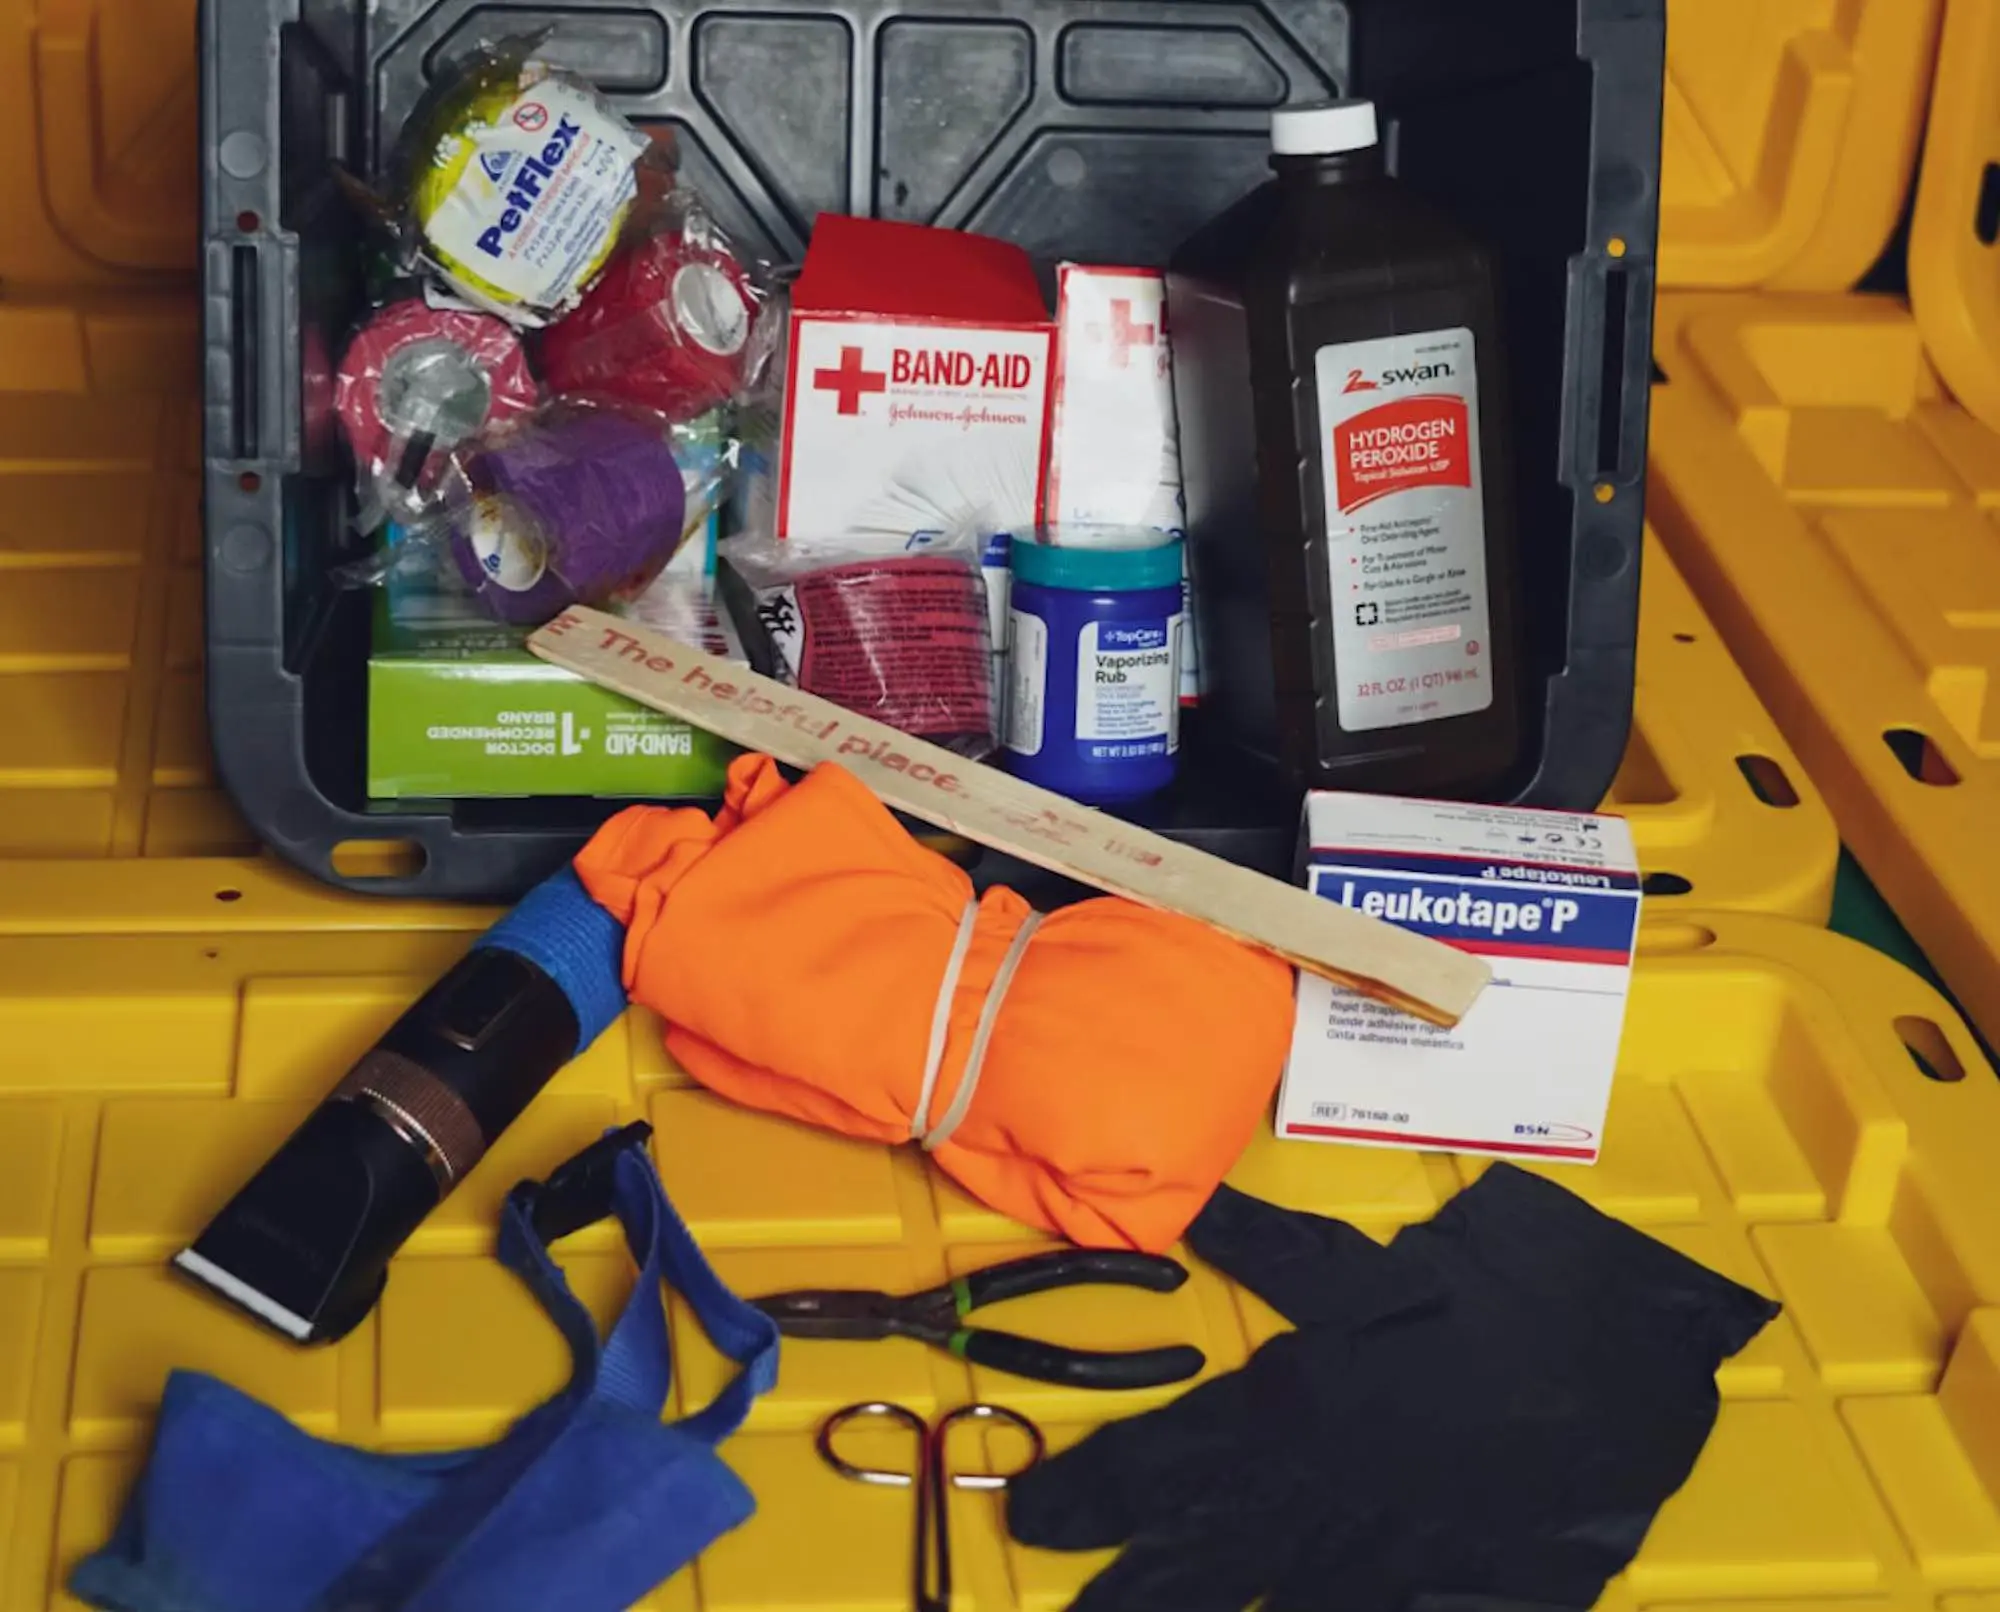
Few things can be so simple, cheap, and versatile as a basic t-shirt. You can find a child-sized t-shirt that will fit your dog at most big box craft stores for a few dollars. I suggest finding one that is blaze orange or fluorescent green. Besides putting it on your dog to keep a bandaged wound covered and clean, it can be cut into bandages, rigged as a makeshift muzzle, or used as a signal for help. T-shirts are multi-taskers and their uses—especially in an emergency—are limited only by your imagination.
Muzzle
Simple nylon muzzles can be found online for a few bucks. If you’re unsure of which size your dog needs, you can even get an inexpensive variety pack. You don’t need anything heavy duty, just one that will fit your dog.
Why a muzzle? A simple nylon muzzle with a Velcro connector is helpful in case you need to keep your dog from biting you while you perform field first aid. While it may be hard to imagine your dog ever biting, don’t underestimate the desperation of a hurt and fearful dog. A muzzle is a small investment in your own safety as well as improved efficiency as you try to care for your injured dog.
Muzzles are also indispensable if your dog likes to rip its bandages off or lick its wounds. A nylon muzzle takes up much less room than a plastic Elizabethan cone and, in my opinion, is much more effective in an emergency scenario.
10 Mil nitrile gloves
How many times have you put on the sterile gloves from a first aid kit only to have them rip while going on? Or cursed them as they ripped in the middle of whatever task is at hand? 10 mil gloves are so tough that you can put them on, forget about them, and even reuse them if necessary. You can easily find them online which will give you a great opportunity to order them in your correct size for the best fit.
Paint stir stick
Wooden paint stirrers are indispensable multi-taskers. For example, you can use them as splints or you can wedge one in the back of your dog’s jaw to keep it from closing while you remove porcupine quills or other foreign objects from the roof of its mouth.
My setter had a tail injury last summer and paint stirrers saved the day as a splint to keep his tail from flexing too much. If you aren’t familiar with tail injuries, it is very difficult to keep any kind of dressing in place because the dog’s tail is constantly moving. Using a paint stirrer was essential in laying a solid foundation for the bandages and dressing so that they could stay in place, yet not be so tight as to impair circulation. Paint stirrers are cheap or even free in some places, if you ask nicely. Carry three or four in your kit and you will find all kinds of uses for them.
Bandage scissors
Most kits come with trauma shears which work for their intended purposes: cutting through clothing, seat belts, and—yes—bandages. But if you find yourself changing a dog’s bandages regularly, you might grow to hate them as much as I did and start to wonder why on earth everyone uses them? I have even witnessed trauma shears cutting the dog’s skin along with the bandages. Far more suited to cutting bandages and dressings are actual bandage scissors. They are delicate and more appropriate for fine work like cutting bandages without disturbing the wound that you are trying to heal. You can find these online or in any pharmacy.
Spring loaded jeweler’s pliers
You can get these versatile pliers at most big box hobby shops. Their primary purpose in a first aid scenario is for removing porcupine quills. If your dog is a repeat offender when it comes to quill pigs, your hands (and dog) will thank you for stashing these in your kit. You won’t be fighting the old, rusty, needle-nose pliers you have been packing around. It will make the job much quicker and may leave your dog with some patience. They aren’t a must-have item, but for a few bucks, they are really nice when your hunting buddy’s “versatile dog” finds yet another porcupine.
Extra bandages and vet wrap
This may seem like a no-brainer, but it is really easy to burn through your supplies when you have a dog that won’t leave its bandages alone. Maybe you have two dogs and they both get injured. How much is enough? You’d be surprised.
A pack of ten gauze pads, ten gauze rolls, and at least five vet wraps doesn’t seem like overkill when trying to be prepared for anything for just one dog. If you will be running multiple dogs in the field, maybe double those quantities.
A word of caution when using vet wrap—there is a technique used when applying it to avoid cutting off your dog’s circulation, so ask your vet to demonstrate that technique next time you go in for a check-up.
Hydrogen peroxide
Talk with your vet to determine the correct dosage for your dog to induce vomiting. Carry a large bottle in your truck and a small one in your vest. If you see your dog eating something potentially toxic or something that could cause an intestinal blockage, you can dose it with peroxide while in the field and, hopefully, have it safely ejected by the time you get to the truck.
Vicks VapoRub or citronella essential oil (with caution)
My setter is notorious for finding ways to pull his bandages off—and eating them. Last summer, his aforementioned tail injury took quite a while to sort out. He constantly contorted himself out of his cone, pulled his bandages off and, if unsupervised, would proceed to eat them. If I wanted to leave him alone for a short time, I would have to put on his cone AND muzzle to keep him from reaching his bandages. It was a terrible ordeal for both of us. I tried bitter apple spray and other bittering agents meant for this purpose, but those didn’t even slow him down. Finally, I tried slathering his bandages with Vicks VapoRub and that was the ticket; he wouldn’t touch his bandages. I have also tried citronella essential oil with similar success, although it was a pretty strong odor to have around the house (but it was an incredibly effective deterrent).
A strong word of caution, though. Both products are toxic for dogs in certain quantities. If your dog is even more persistent than mine and licks the rub off or eats its bandages, you will need to see a vet asap. Either of these products must be used carefully and with proper supervision.
Trap and snare tools
Many states allow trapping on public lands and, even if not legal, there are also poachers who set snares on public and private land in any state. As a bird dog owner, you can never assume that an area is trap- or snare-free. The first line of defense is learning how to disarm a trap or snare if a dog is unlucky enough to be caught in one. This also requires carrying the right tools for the job; once a trap or snare is sprung, you will not have the time for on-the-job training.
Add heavy-duty zip ties to your kit and carry some in your hunting vest. YouTube has excellent videos that show how to use them to open conibear traps. Include heavy-duty 30-gauge wire cutters that will easily fit in your vest in case your dog finds a snare.
Leukotape
Perhaps the best kept secret in the pharmacy, leukotape is tenacious, waterproof tape intended to be used as a second skin to prevent blisters. I find it is an absolute life saver for making sure that bandages stay where they need to be until you can reach a vet for proper dressing.
Since it is waterproof, it is also excellent for securing dog boots—I have yet to lose one when using leuko tape. It’s inexpensive, so buy a few rolls for your kit. I promise you will love it if you have been struggling to keep your dog’s boots or bandages in place.
Battery-powered beard trimmers
Besides sculpting your facial hair in the field, a beard trimmer is handy to shave the area around a wound to properly clean it. Trimmers are also useful for cutting out burrs in long-haired dogs if you don’t want to risk injury by using your scissors on a tangle too close to the skin. Battery-powered trimmers are harder to find than rechargeable trimmers, but worth it because it is easier to carry a couple of spare batteries than it is to keep a unit constantly charged for the moment you might need it.
How to store your canine first aid kit
Avoid the temptation to use expensive, highly-sought-after name-brand totes as first aid storage. These totes often have stickers and logos broadcasting the contents to anyone who can recognize the brands. A thief is going to look through the windows of your unattended vehicle, recognize the name brand of that tote, and bust out your windows to steal it. This is of course sad for the vehicle, but worse if your kit is missing when your dog is injured.
In my opinion, it’s much better to keep your first aid equipment hidden in something that doesn’t invite thieves. I use one of those black totes with the yellow lid to keep my first aid stuff in. These totes are so commonplace now that they wouldn’t look like an interesting target for a thief. An added bonus of the tote is that the lid becomes a clean tray to place all the first aid materials you plan on using.
Know how to use your first aid kit
I sometimes see people treat their extensive canine first aid kit as a status symbol, often filling it with every bell and whistle on the market. This is fine, but you need to know how to actually use the items that you are including in your kit. Your kit must be manageable and usable. You must be able find the item you need quickly and must be educated on the best tools for the event that you are mitigating. So rather than spending a ton of money on products, spend some time investing in your own knowledge of basic first aid skills for the field.
Finally, a canine first aid kit isn’t a static thing. Over the years you will add or even throw away things as your experience dictates and your needs change. If you are unfamiliar with anything in your first aid equipment, talk to your vet and get their input. This is where it helps to have vet who understands the unique needs of hunting dogs.
When your dog does inevitably get injured in the field, use the visit to the vet to your advantage and ask the doctor what you could have improved upon in your field first aid kit and if are there any tools or supplies that could have helped in that situation. If a vet isn’t willing consider that—as a gun dog owner—you will be performing first aid on your dog in the field and if they are resistant to giving life-saving advice and working to give your dog the best possible odds of surviving an accident, then find a new vet that understands you and your dog’s lifestyle.
Injuries are part of the price of playing the hunting game and they will come in every shape and form. Your dog might even be so accident-prone that it invents new ways to get hurt, so it’s best to be prepared for anything. Most importantly, be prepared to learn and adapt as your life with hunting dogs unfolds.