

Demystifying the Gunfitting Process
An in-depth look at the gun fitting process, from terminology to proper gun fit dimensions, with a professional gun fitter and stock maker.
The process of fitting a gun to a person and its underlying principles have, at times, been made to seem mysterious and even alchemic. As a custom stock maker and gunsmith, gun fitt is rather simple. Gun fit is a necessary and integral part of making a custom stock for a client. It also provides the required stock dimensions for altering a client’s existing guns to fit better.
Listen to more articles on Apple | Google | Spotify | Audible
Gun fitting theory is based on a straightforward concept: using the physical architecture of the stock to control the shooter’s point of aim and make the mounting and firing of the gun feel comfortable and natural. Remember that gun fitting adjusts the stock dimensions to the shooter; gun fitters don’t expect the shooter to adjust to the stock dimensions.
Let’s break down this concept in pragmatic terms:
- Impact point: the place at which a shotgun’s barrels cause its patterns to strike at a given distance. In the gun fitting process, the impact point is assessed at sixteen yards.
- Line of sight: the linear alignment of the bead and the shooter’s dominant eye. By controlling the position of the shooter’s eye, we can control the horizontal and vertical alignment (i.e., the vector) of the line of sight in relation to the barrel’s impact point.
- Shooting to the point of aim: when the shooter’s line of sight aligns with the center of the gun’s impact point. A common phrase for this is “the gun shoots where you look.” If the stock fits the shooter properly, and the shooter mounts their gun correctly, the gun should shoot to the point of aim without the shooter having to adjust to the gun in any way.
Why are these details so important? Whether we’re in the field or on a clays course, we have a relatively short time to bring a shot to fruition. At times, tenths of a second can make a difference. We have a finite amount of conscious attention to allocate to shooting situations. We must apply that limited attention to things that require it, like getting in position for the best shot opportunity, using proper shooting techniques, and being aware of omnipresent safety concerns. Your attention is better spent thinking about things like, Where are my fellow hunters? Is this a safe shot? What kind of foul deeds is or isn’t my dog up to? not consciously adjusting to a gun that doesn’t fit properly. Doing so can have detrimental effects on shooting success.
A well-fitted gun and practiced technique ensure that mounting and shooting become nearly subconscious, instinctual acts. In this sort of “flow state,” we can develop shooting proficiencies that would otherwise be impossible to attain.
How does a batter hit a hundred-mile-an-hour fastball? How does a golfer make a hole-in-one? They will undoubtedly fail if they consciously think about it during their swing. What would happen if that golfer used clubs that are three inches too short? We can never maximize our full potential if we constantly compensate for poor-fitting equipment.
*My terminology relates to double guns, i.e., over-and-under and side-by-side guns. However, the same principles apply to single-barrel guns. In this article, I am assuming the double gun barrels are well-regulated. This means the patterns of each of the two barrels shoot at the same spot.
Off-the-Rack Guns
Again, an important underlying concept of good gun fit is that mounting and shooting the gun should feel natural and comfortable. We should never feel like we are struggling to mount the gun properly. The gun should never feel uncomfortable when we fire it. If the gun mount feels natural and comfortable, the process will become more and more consistent. A consistent gun mount is the foundation for effective shooting.
Most of the shotguns available to us are made via a mechanized, assembly-line-like process. Of course, depending on the cost and quality of the gun, there will be varying degrees of hand work and final finish. However, by and large, the guns of today are made in this assembly-line fashion. The design features are limited and standardized to create efficiency in the manufacturing process. It’s shocking how few design choices we have in new off-the-rack guns. This is especially the case with stock dimensions.
Most well-known companies offer only one or two different sets of stock dimensions. Most “factory average” stocks are made to fit the ubiquitous 5’10”, 180-lb male with an average build. If you’re this person, consider yourself lucky when purchasing shotguns. If, like myself, you do not fit into this category, getting a well-fit gun can require more effort.
As a side note, it’s worth mentioning that some shotguns have adjustable shim systems that alter the stock dimensions. They are primarily auto-loaders and pump guns, but I know of one over-under that has one. The amount of adjustments these systems are capable of is somewhat limited. A person must understand how gun fit works to use these shim systems effectively, too. I have seen clients drive themselves insane with a shim system because they didn’t understand how or what they were trying to accomplish. If you are partial to shotguns of this design and have the aid of a component gun fitter, shim systems can be effective.
The Skill of Compensation
In American shotgun culture, shooters are expected to buy and immediately start using an off-the-rack gun. By design, we are expected to alter our shooting form and technique to guns that may fit us terribly. We develop many bad habits and coping techniques while attempting to become proficient with poor-fitting guns. We teach ourselves the skill of compensation without realizing we are doing it; it’s a genuinely insidious process. Once these bad habits ingrain themselves in our shooting technique, they can be incredibly hard to correct. This issue is particularly relevant to youth and new shooters.
I am a perfect example of this. Due to my stocky build and short neck, from the very start, my stocks were far too long for me. To compensate for this, I developed the habit of way overextending my neck to get my head far enough forward. Overextending my neck was uncomfortable and riddled with inconsistency. This compensating technique eventually ironed itself into my shooting style. I shot like this for years. As I started my career and learned about gun fit and proper shooting techniques, I eventually corrected the issue. But even with a well-fit gun, it took a long time to fix that bad habit. Twenty-five-plus years later, I still occasionally have problems with it.
It’s incredible how marketers try to tell us it’s acceptable to buy guns that don’t fit. Then, they try to convince us the best way to compensate for our shooting deficiencies is to use ridiculously overpowered shotshells. It’s best not to nosedive down that rabbit hole, but I digress.
Gun Fitting Tools
The tangible product from a gun fitting is a set of data points. These data points are a three-dimensional map of your ideal stock. With these data points in hand, someone can order a new gun from the factory with a custom stock, have a custom stock made for an existing gun, or have the stock of an existing gun altered to fit.
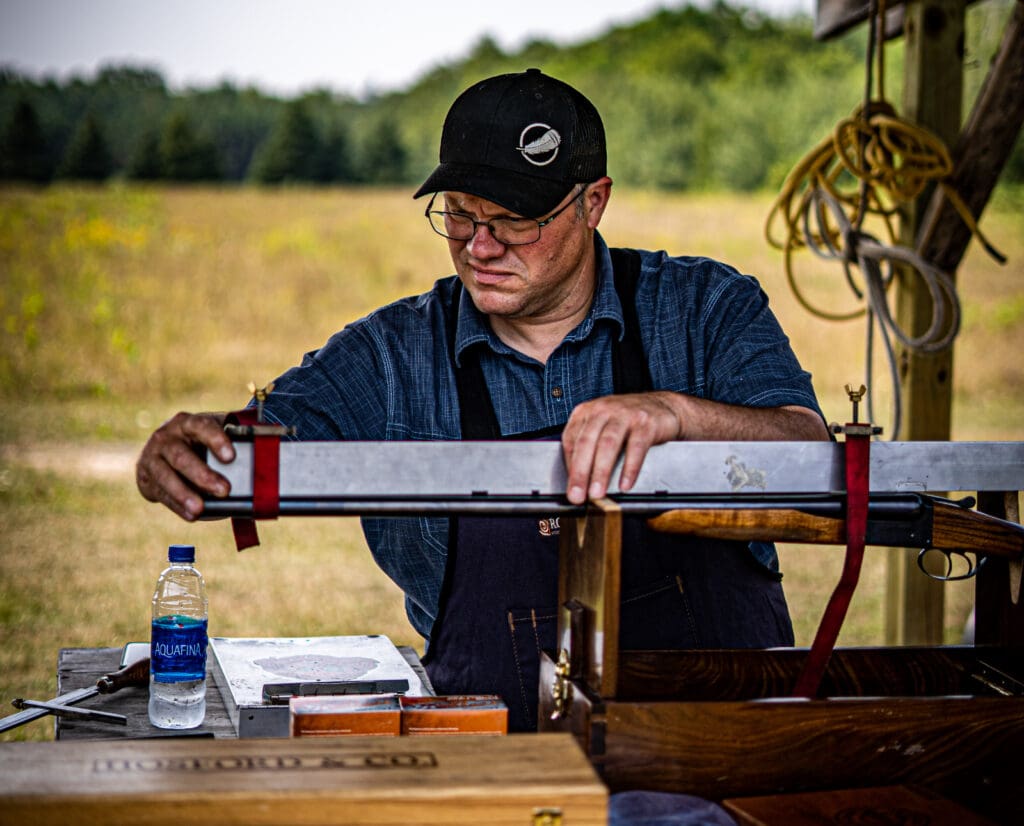
These aforementioned data points are referenced from a rearward projection of the line of sight. This rearward projection is created by a stock measuring tool, which is a long, perfectly straight aluminum bar that straps onto the barrels and extends out over the entire stock length. There is a moveable gauge attached to the bar that has both horizontal and vertical scales. The gauge is lowered onto the stock in specific places, and measurements are taken.
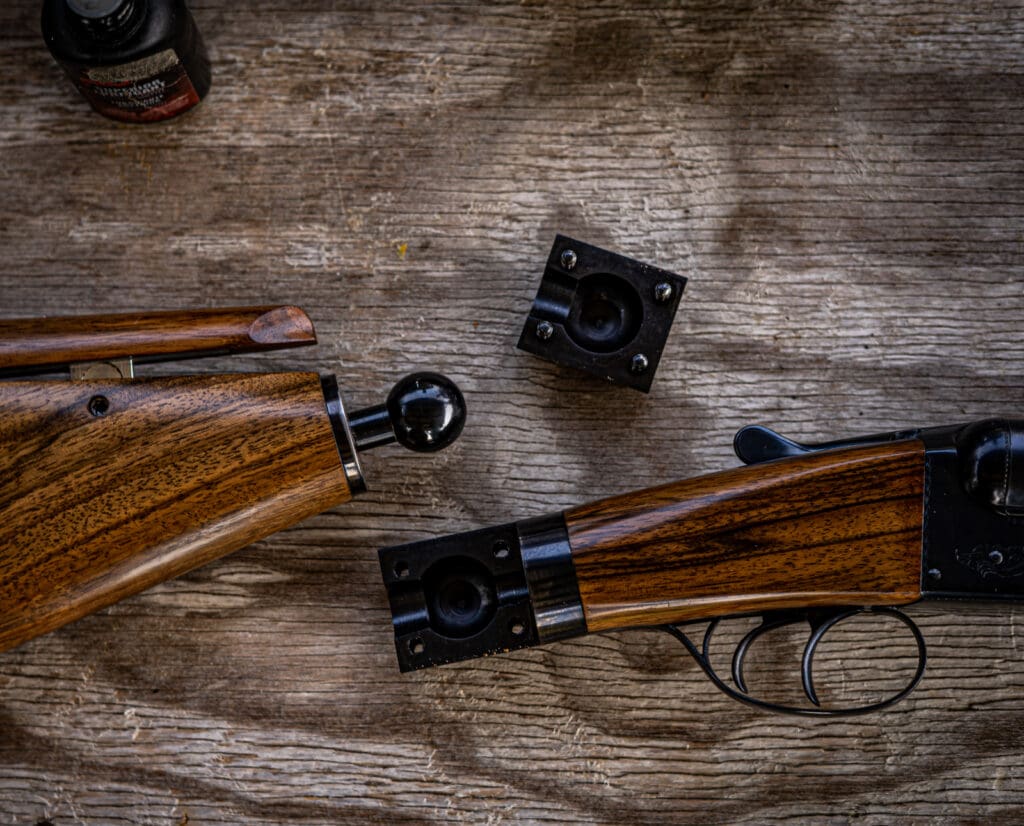
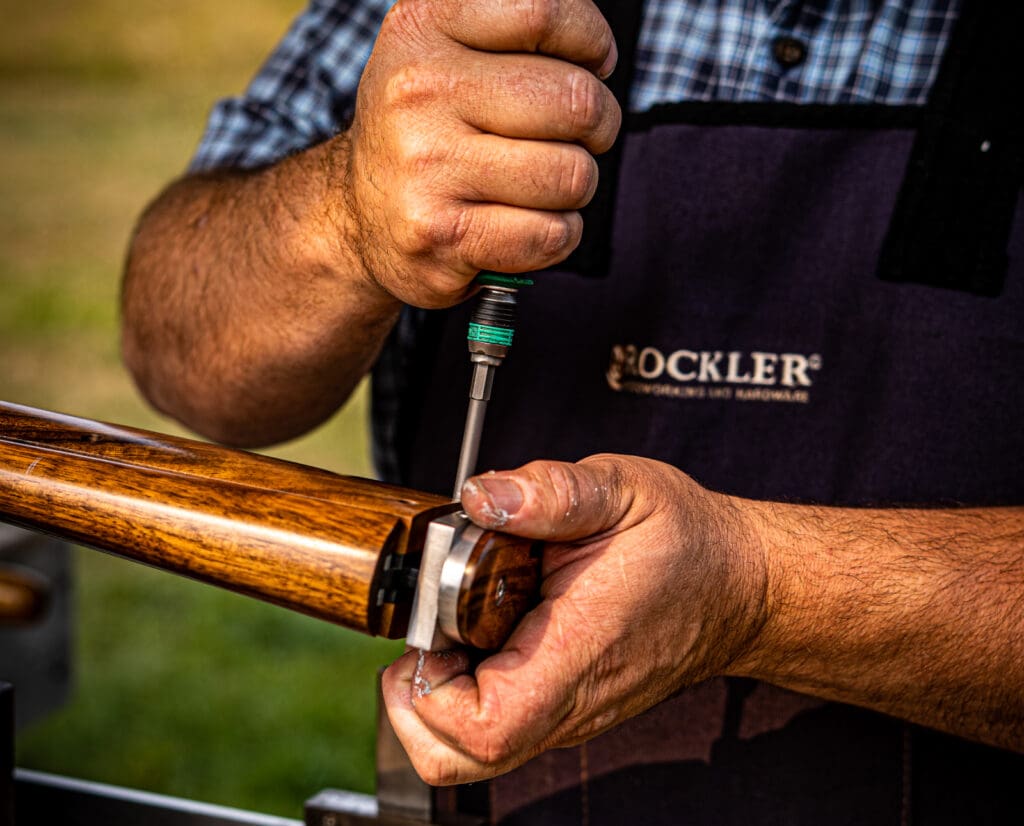
One of the main tools I use during my gun fittings is a try-gun. A try-gun is a shotgun with a fully articulated stock that can be altered to nearly any reasonable dimensions. The butt can swing side to side and up and down via a locking ball and socket joint in the wrist. This joint is of my design and manufacture. The length of the stock, the angle of the comb, and the angle of the butt are also fully adjustable.
The side-to-side movement is called “cast off” for a right-hand shooter and “cast on” for a left-hand shooter. The up-and-down movement is called “drop.” Cast and drop are measured at three places along the top of the comb: the nose, face, and heel (i.e., the front, the middle, and the rear of the comb).
The rear of the comb is also hinged and can be raised and lowered. The two opposing pivot points, one at the wrist and one at the rear of the comb, allow me to control the front-to-back downward angle of the comb. I can move the comb like a swing arm, up and down in a parallel fashion, or keep the drop at the heel constant and push the nose down.
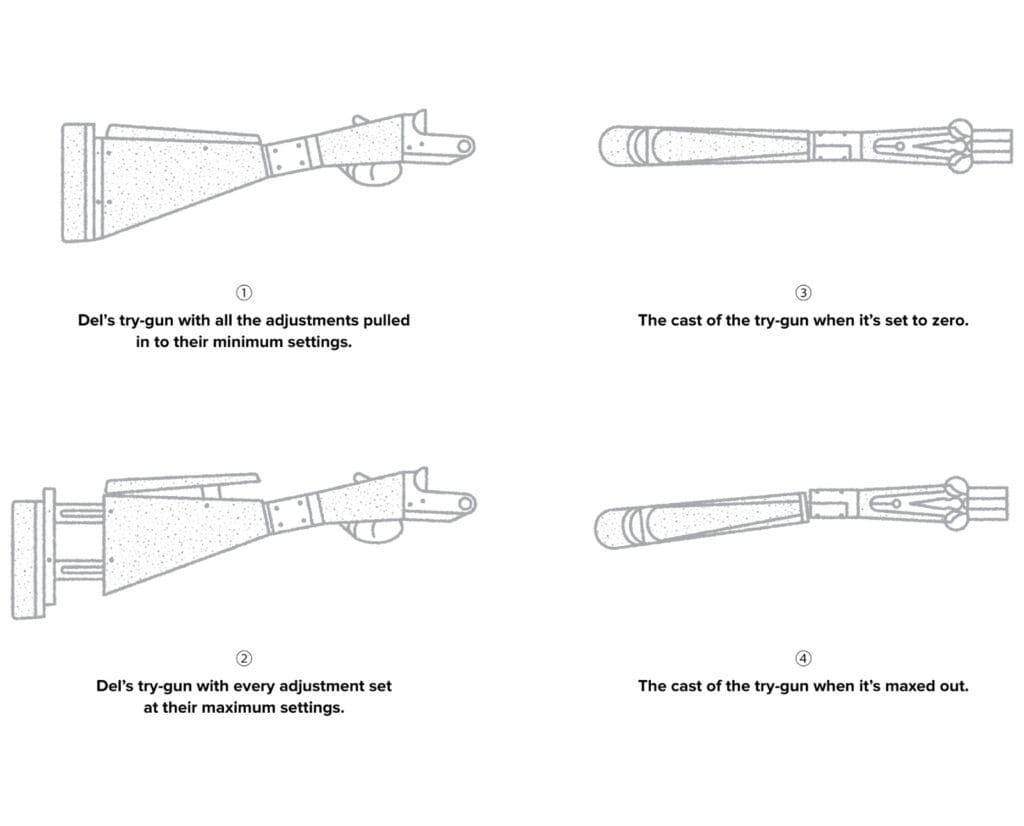
The distance from the center of the front trigger to the center of the butt is called “length of pull,” or LOP for short. The butt plate is mounted on two telescoping rods that move in and out of the stock, thus increasing or decreasing the LOP. The rods are mounted at the top and bottom of the butt plate and move independently, so I can also affect the angle of the butt in relation to the line of sight. This angle is referred to as “pitch.” The pitch is measured via a protector mounted on the stock measuring tool.
The wrist is a ball and socket joint. So, I can not only move the stock horizontally and vertically, but I can twist it radially. I can keep the drop and cast at the heel in the same spot and twist the bottom of the butt out. The bottom of the butt is called the “toe.” This outward movement of the toe is called “toe-out.” Toe-out is referenced to the cast at heel. So, if you have ¼ inch toe-out, that means the toe has been twisted ¼ inch farther out than the heel.

Now, we have the nine dimensions of gun fit:
- Cast at the nose, face, and heel
- Drop at the nose, face, and heel
- Length of pull (LOP)
- Pitch
- Toe-out.
The grip design and trigger configuration are also always taken into consideration.
Shotgun Fittings
So, how does one go about getting a fitted shotgun? The first step is to get a gun fitting from a competent Gun Fitter. My gun fittings consist of four segments and take roughly three hours.
When I begin a gun fitting with a new client, first, I explain the theory of gun fit, why it’s essential, the data points I obtain, and how they are referenced. Much of this has been relayed in this article. I like my clients to understand how, why, and what we are trying to accomplish together. This enables the client to give me good feedback and have a positive experience during the fitting. Once this is done and questions answered, we walk down to my gun-fitting range.
My range comprises a four foot by eight foot heavy steel plate mounted on a sturdy wood frame. The vertical center of the plate is seven feet off the ground. Exactly 16 yards from the plate is the covered deck of my shooting shed. Its barn-style doors face the patterning plate. The doors swing open and stop on the corner posts, supporting the roof section that covers the deck. This setup provides good protection from wind, rain, and sun.
Next, I give the client brief instructions on how to properly handle the try-gun. I demonstrate the three shooting techniques necessary to get good, clean data from the fitting. These techniques are not intended to alter the style or nuance of the client’s shooting; instead, I want how the client shoots at the plate to be as similar as possible to how they shoot the field. These techniques are:
- Proper stance to the target
- Having a weight-forward posture
- Comfortable and natural head placement on the stock
I want the fitting data to result from a natural, comfortable, and most importantly, consistent gun mount. When employed together, these three techniques are the bedrock of consistency. Every conceivable shooting style will evolve from these three simple, yet vital, techniques. It doesn’t matter if you’re shooting American trap, Olympic skeet, grouse in Maine, or sharptails in Montana; these foundational techniques apply. Applying these techniques is so simple and easy, they rarely change the dynamics of a client’s style.
Third, the fitting transitions into the “dry fit” segment. The client starts a series of practice gun mounts. The client is gets used to handling the try-gun during these practice mounts. At the same time, I am beginning to assess the needed initial dimensional changes. An eye dominance check is worked in at this point as well. The goal is to get dimensions as close as I can by eye. That way, when we start shooting live ammunition, we can spend more time fine-tuning the point of aim. Once the dry-fit is as close as I can get it, we are ready for the final segment.
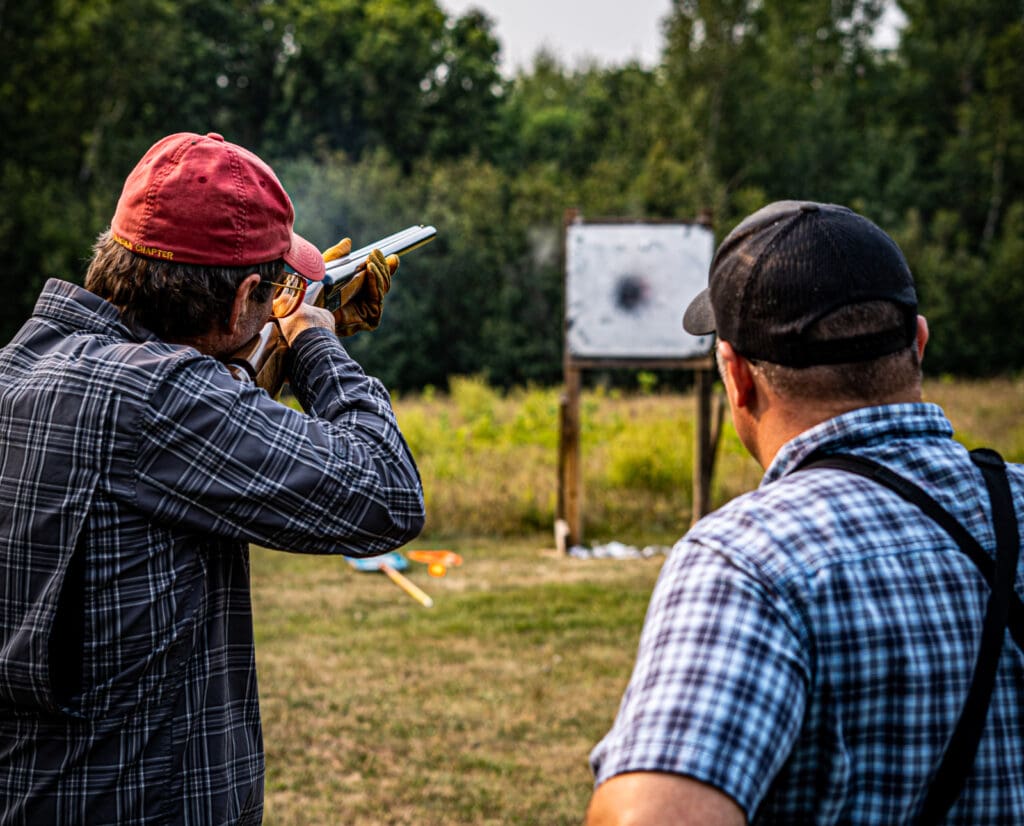
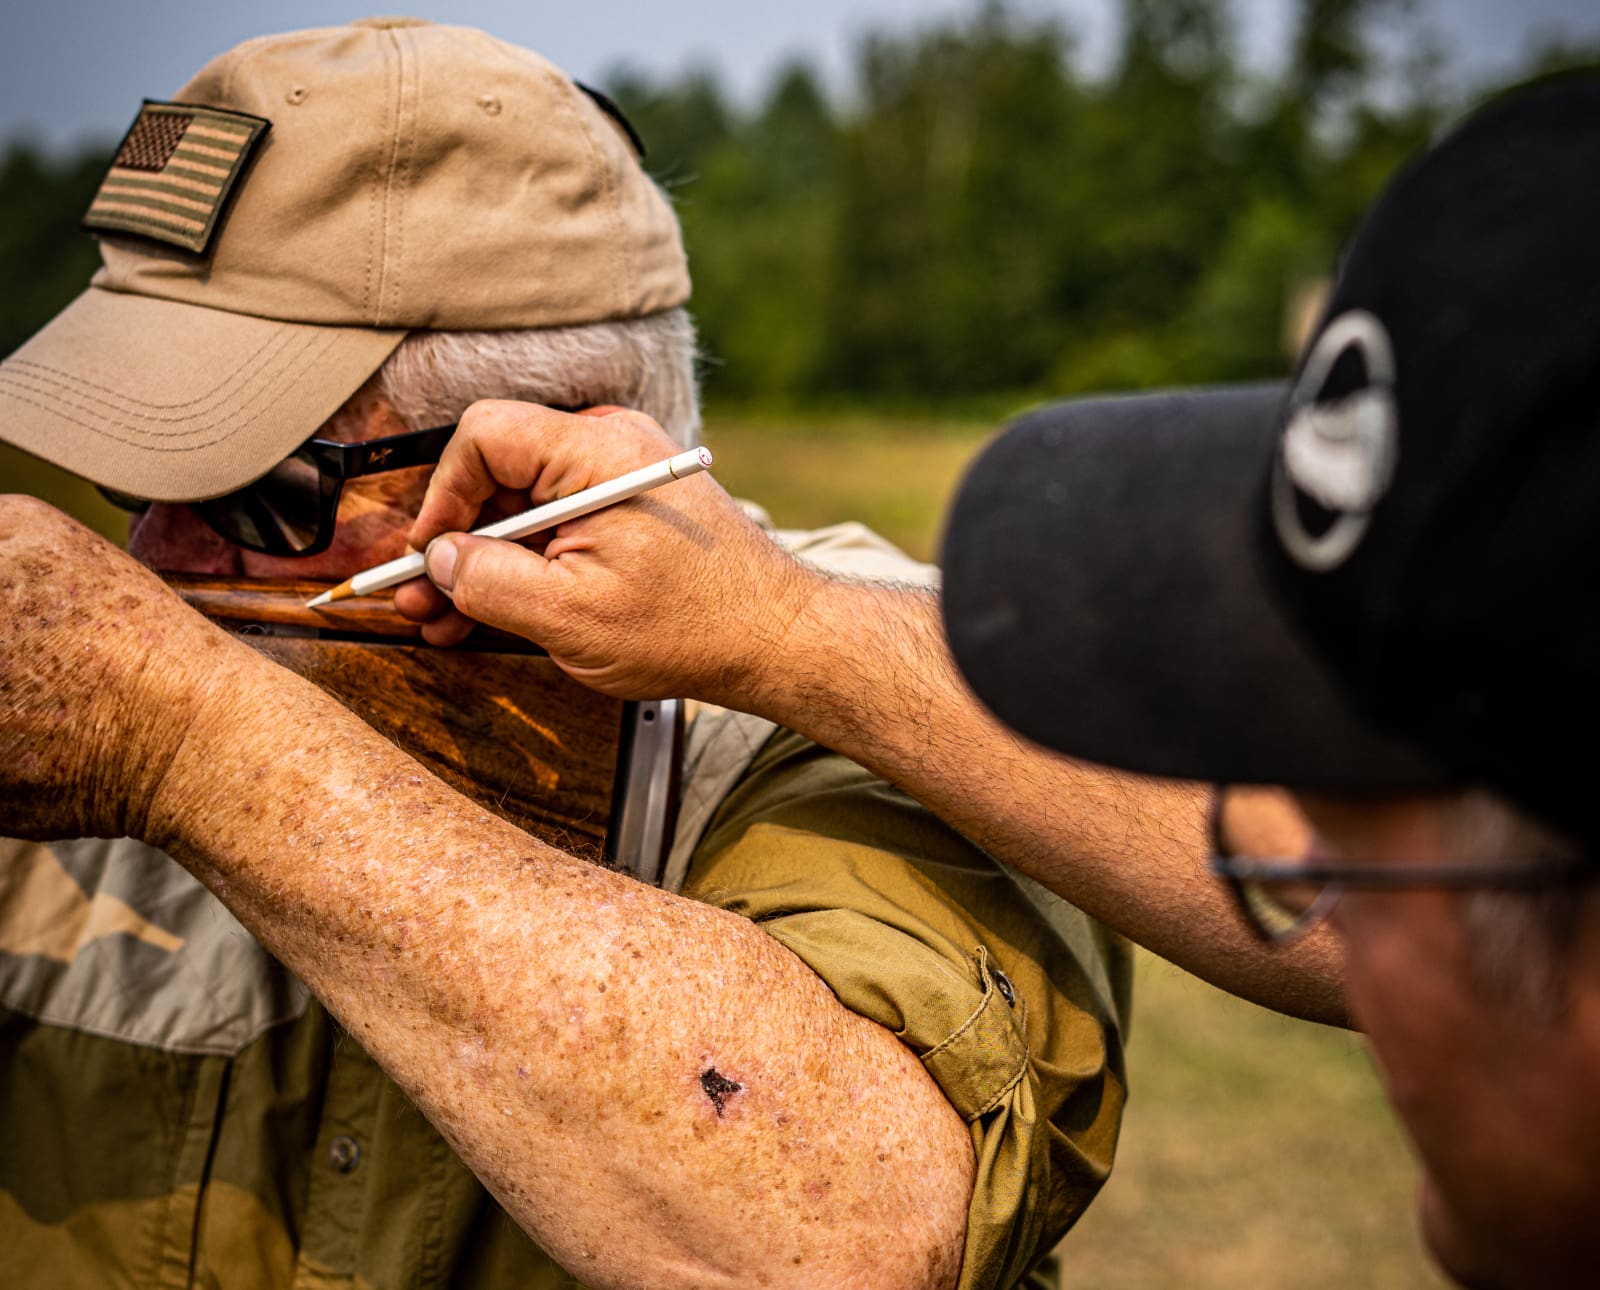
The fourth segment during my gun fittings is the live fire portion. The plate is painted white. A stencil is used to spray paint a six-inch orange dot on the plate. The client then fires three to five shots at the dot. I am standing just to the side of the client as they shoot, assessing how the stock dimensions affect their gun mount as they shoot. I am also observing the placement of the patterns on the plate. We always shoot three to five times at the same target. No shooter’s gun mount is ever entirely consistent from shot to shot. So, I use the combined average placement of the shots to assess their point of aim. I will then make dimensional changes to the try-gun to align their head and eye better and help make the gun mount comfortable and natural. Then, the plate is repainted, and the process is repeated until the stock dimensions are adjusted so that the client’s point of aim places the patterns directly on target. The number of cycles this takes varies significantly; it mostly depends on how close I get during the dry fit segment. It also depends on the shooting proficiency and mounting consistency of the client. Sometimes, it takes as few as three cycles, other times, as many as fifteen.
Once the try-gun is altered to the client’s optimal dimensions, the nine gun fitting dimensions are recorded onto a gun-fit spreadsheet. The client can now use this data to order their new custom-made stock or alter their existing guns for a better fit.
The benefits of a custom stock require some time and money, but I’ve never had a client go through the gun fitting process and believe it wasn’t worth every bit of the investment.
Nice article! As a female shooter, my frustration has been fitment after purchasing 3 semi auto waterfowling guns. I really wish there were more ways to get a better fitting gun but it’s tough without going custom, and even then custom is tough for waterfowl. My biggest advice to new hunters is to at least try out the shotgun before you buy it if you can find a demo place.
I look forward to the day when I can get myself a custom OU.
I was recently fitted by Del. I highly recommend him. Dollars well spent
I also was fitted by Dell the fitting was very well done and highly recommend this to anyone.